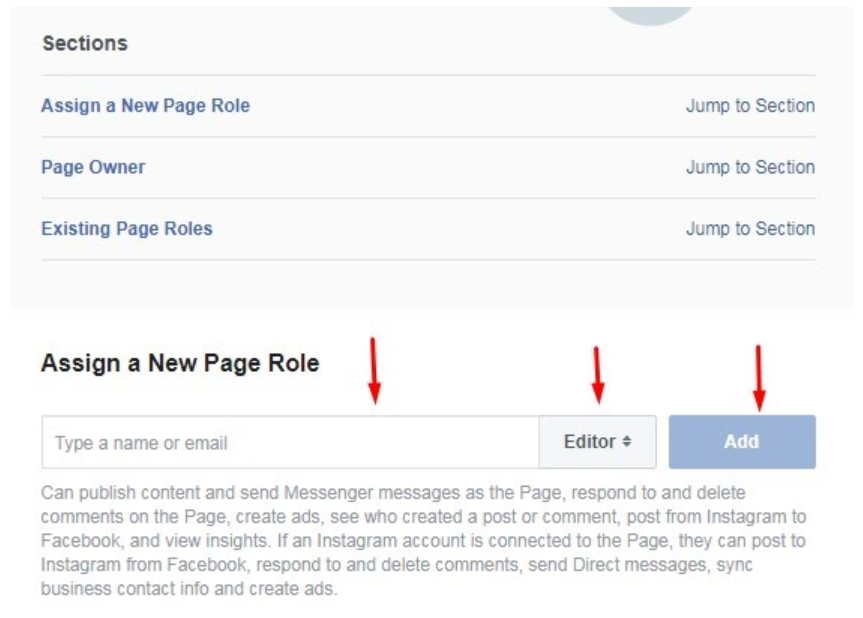
If you already have a pixel created, then you can go to the bottom section to see how to access it. However if you have not created one start here.
How to Create a Pixel
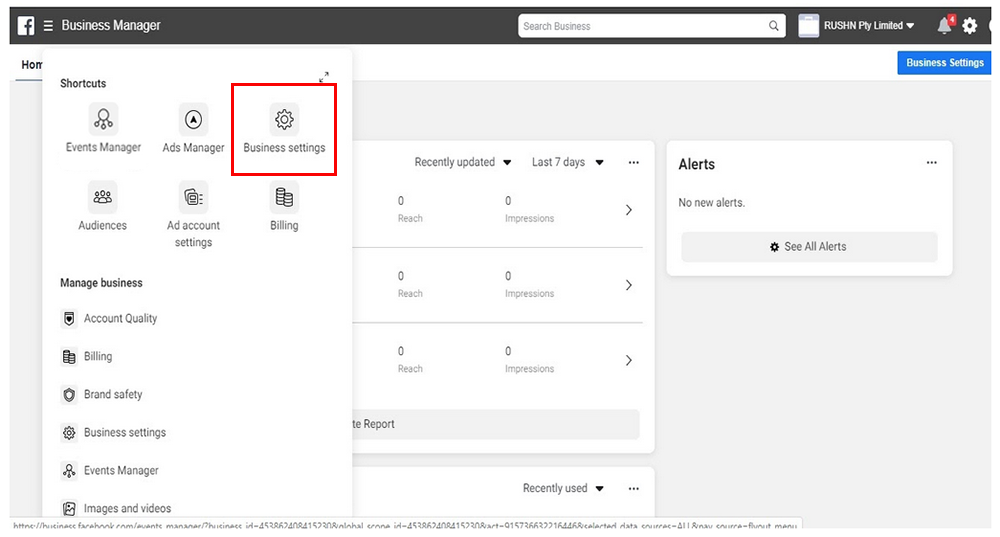
Go to Business settings in Business Manager.
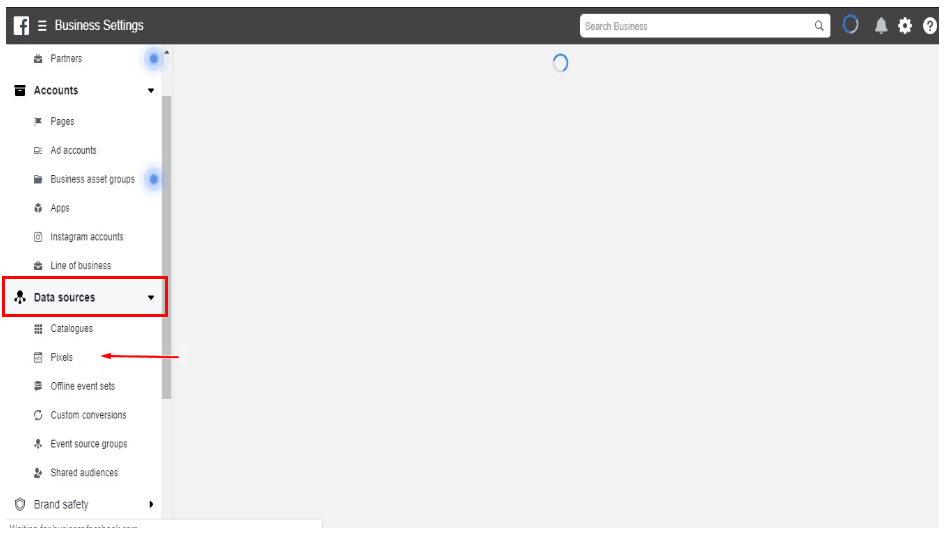
Click Data sources & Select Pixels
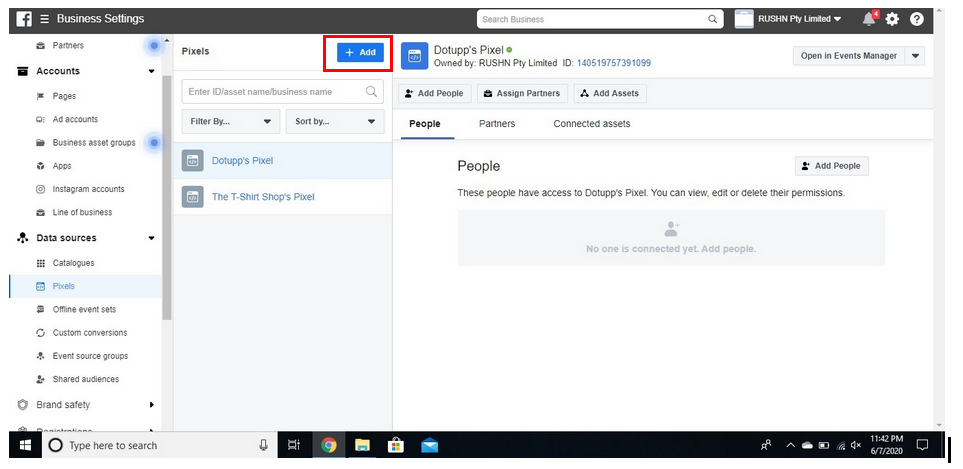
Click the + Add button
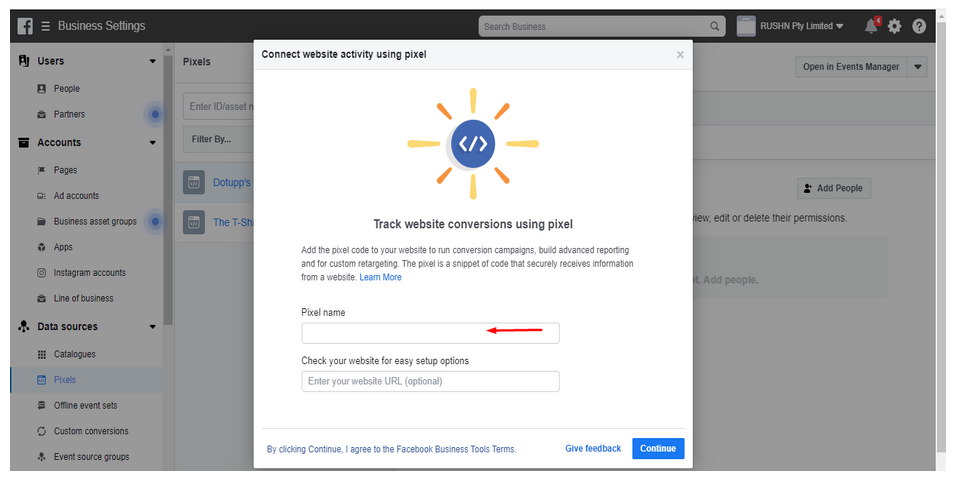
Enter a name for your pixel
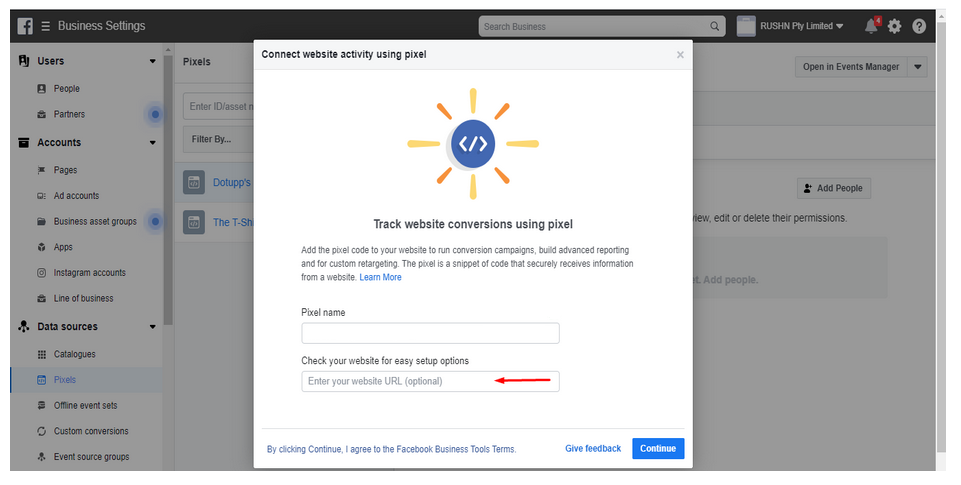
Optional: Enter your website URL.
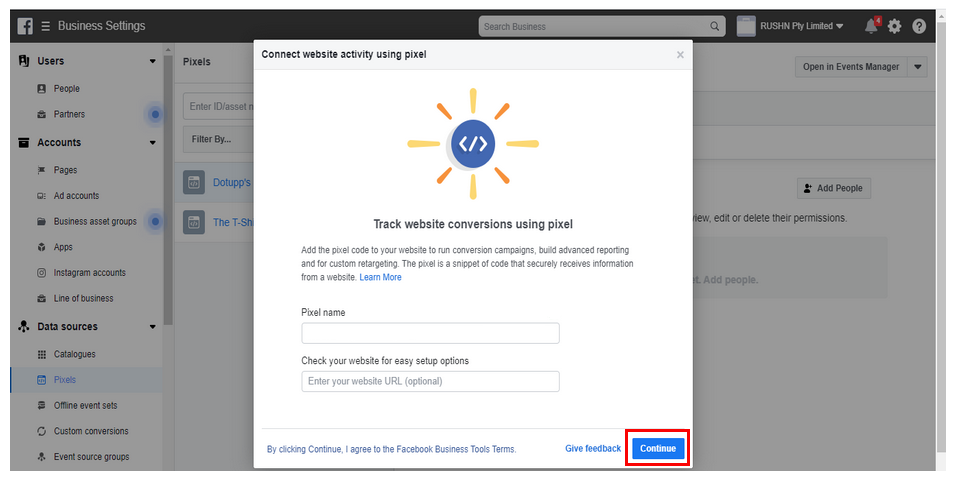
Click Continue
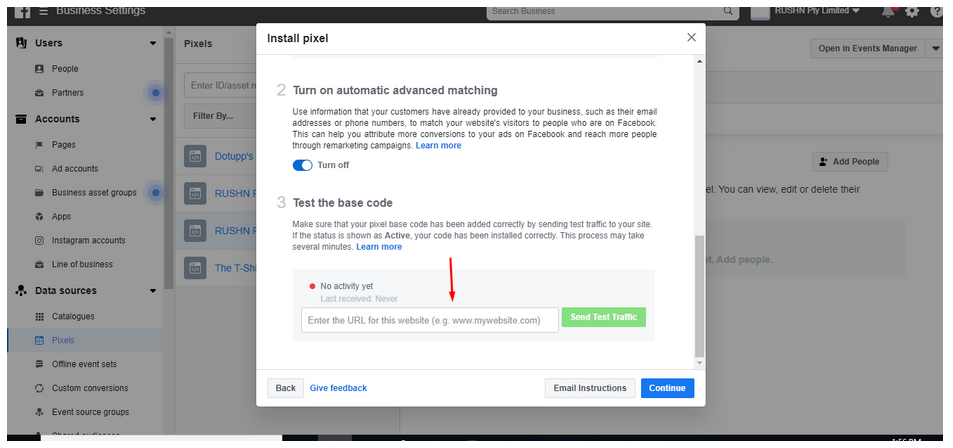
Check whether you’ve installed the code correctly by entering your website URL and clicking Send Test Traffic.
See below for how to access you pixel.
Copy and paste the pixel into the order form when you order a Facebook Fan Page Set-up. We include installing the pixel as part of the package.
How to get your Facebook pixel ID
Log in to Facebook and go to your Ads Manager account.
Open the Navigation Bar and select Events Manager
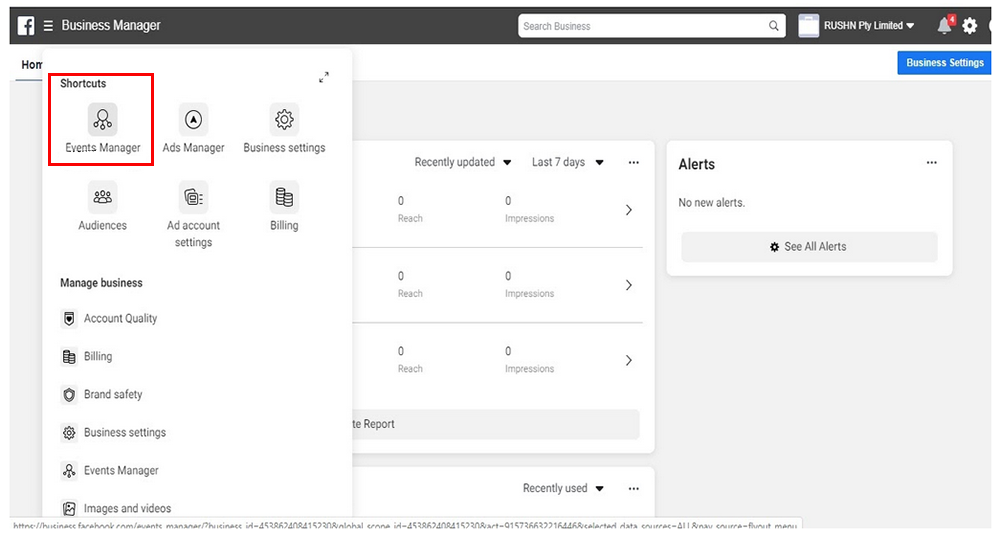
Click on Data Sources
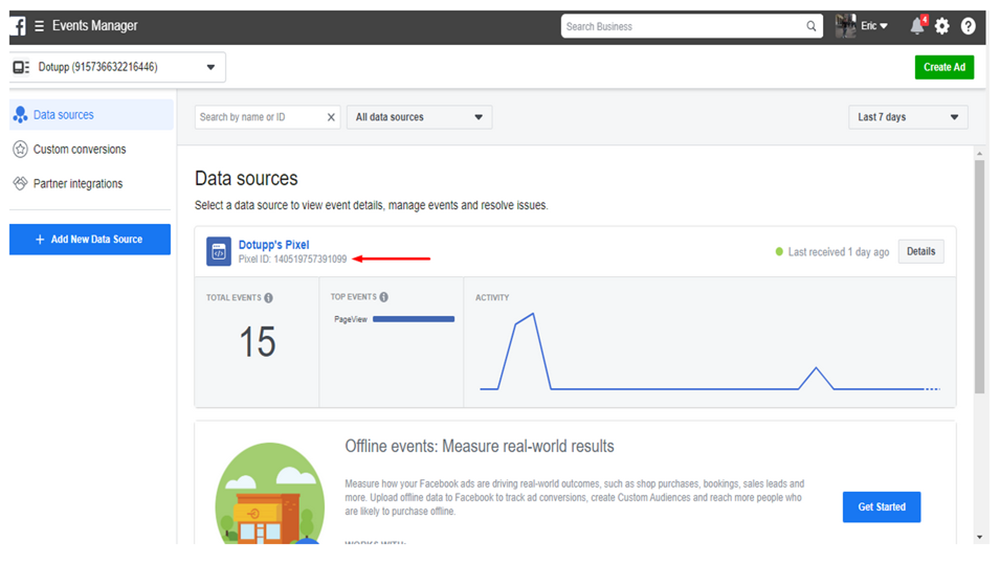
Copy your Pixel ID from underneath your Site Name
How to get the full Facebook pixel code (different from pixel ID)?
Log in to Facebook and go to your Ads Manager account.
Open the Navigation Bar and select Events Manager

Click data sources
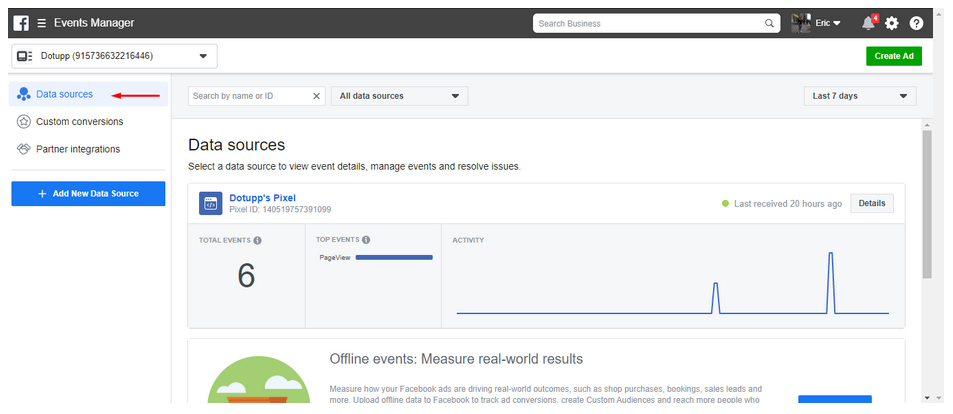
Click on your pixel

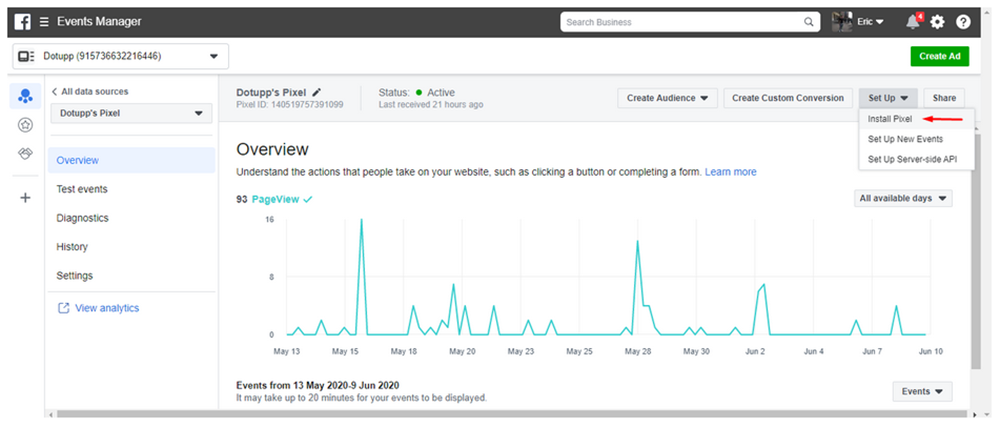
Click Set-up
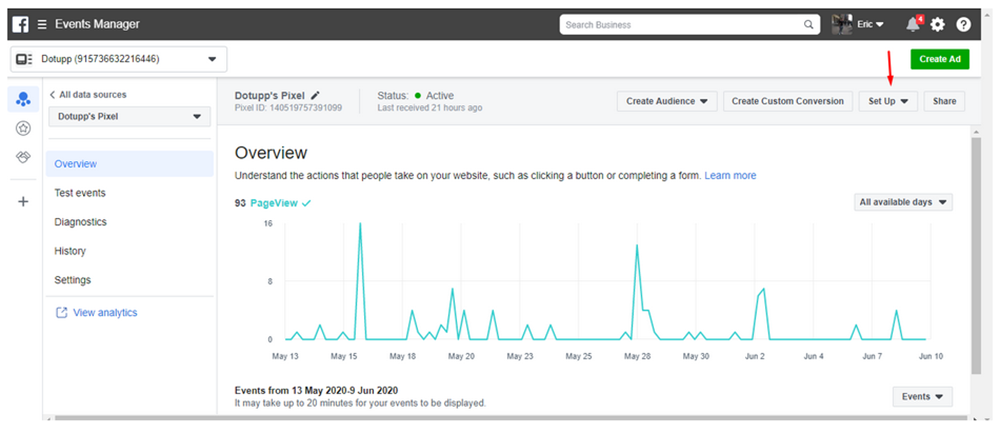
Click install pixel
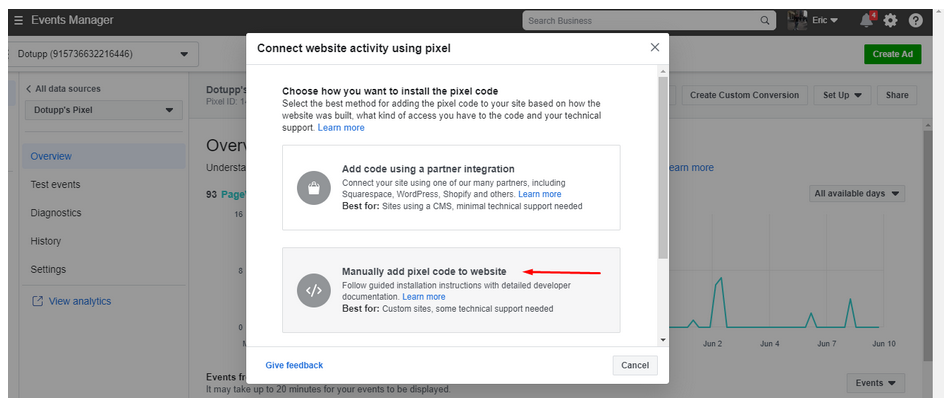
Click – ‘Manually add add the pixel code to website’. This will bring up your pixel code which you can then copy to your clipboard.
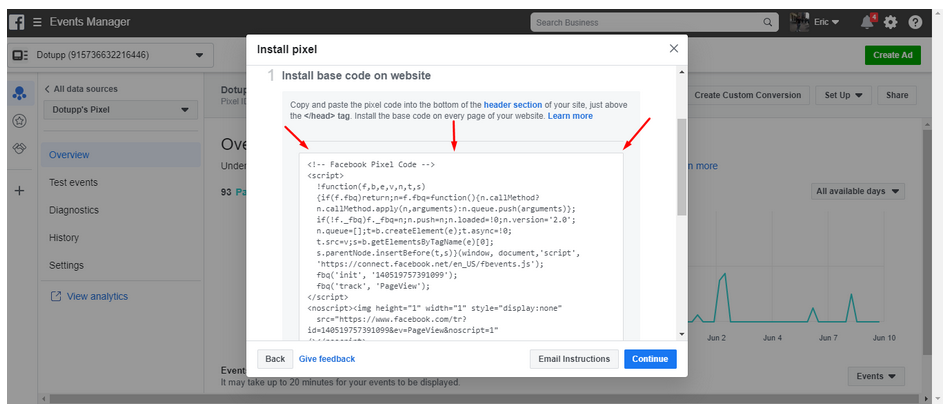
Copy all the code shown in the box and send it to us in an email or in an order form if you are purchasing online.
Let us know if you have any additional questions.


